To search for a particular Surname, click on the appropriate letter below.
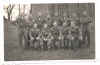
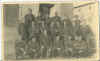
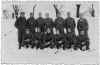
This is the third set of photographs of men who may have been through Stalag 18A
but I have not been able to identify. Some of them may be men whose names appear in the Roll Call.
If you can identify anyone in these photographs, then please
E-mail me.
| Picture 81: |
Picture 82: |
Picture 83: |
Picture 84: |
 |
 |
 |
 |
| Moore Group 1 |
Moore Group 2 |
Moore Group 3 |
Moore Group 4 |
| Picture 85: |
Picture 86: |
Picture 87: |
Picture 88: |
 |
 |
 |
 |
| Allan Vaughan Group |
Albert Hobbins Grp 1 |
A Hobbins Grp 2 |
A Hobbins Grp 3 |
| Picture 89: |
Picture 90: |
Picture 91: |
Picture 92: |
 |
 |
 |
 |
| A Hobbins Grp 4 |
C Thompson Group |
1017/GW (St Lambrecht) |
Jack Heckels Group |
| Picture 93: |
Picture 94: |
Picture 95: |
Picture 96: |
 |
 |
 |
 |
| Albert Scott Group |
Doug Bryant boxers |
Vigouroux Group 1 |
Vigouroux Group 2 |
| Picture 97: |
Picture 98: |
Picture 99: |
Picture 100: |
 |
 |
 |
 |
| Harold Bain Group |
Dennis Beaton Group |
Stalag 18A/Z Group |
10105/GW |
| Picture 101: |
Picture 102: |
Picture 103: |
Picture 104: |
 |
 |
 |
 |
| Jim Sanderson Group |
Panto programme (18D) |
Rob Edwards group 1 |
Rob Edwards group 2 |
| Picture 105: |
Picture 106: |
Picture 107: |
Picture 108: |
 |
 |
 |
 |
| 291/GW? |
Vic Pelton group |
785/GW, Weissenbach |
Stan Lock group (235/L) |
| Picture 109: |
Picture 110: |
Picture 111: |
Picture 112: |
 |
 |
 |
 |
| William Sturrock group |
Jack Mooney group 1 |
Jack Mooney group 2 |
Jack Mooney group 3 |
| Picture 113: |
Picture 114: |
Picture 115: |
Picture 116: |
 |
 |
 |
 |
| John Spence group (11041/GW) |
Dennis Leeson 1 |
Dennis Leeson 2 |
Dennis Leeson 3 |
| Picture 117: |
Picture 118: |
Picture 119: |
Picture 120: |
 |
 |
 |
 |
| Jack O'Donnell 1 |
Jack O'Donnell 2 |
Frank Morris on left |
Frank Morris group |

Return to last page


